
Before You Begin
🔗 Use the GraphQL Playground to execute the queries in this guide.
➡️ New to GraphQL? Learn how to navigate the Playground with our Playground Basics Guide.
Prerequisites
-
Authentication: Use a Service Account token (Personal Access Tokens are deprecated).
-
Permissions: Ensure your token has the necessary permissions.
-
Organization ID: Identify the Organization where the pipe will be created.
Step 1: Find Your Organization ID
1. Via Pipefy UI
- Open the Organization in your browser.
- The URL will include the Organization ID: https://app.pipefy.com/organizations/123456789.
- Organization ID = 123456789 (the number after /organizations/).
2. Via GraphQL Query
- Check on our Get resource IDs page.
Step 2: Create the Pipe
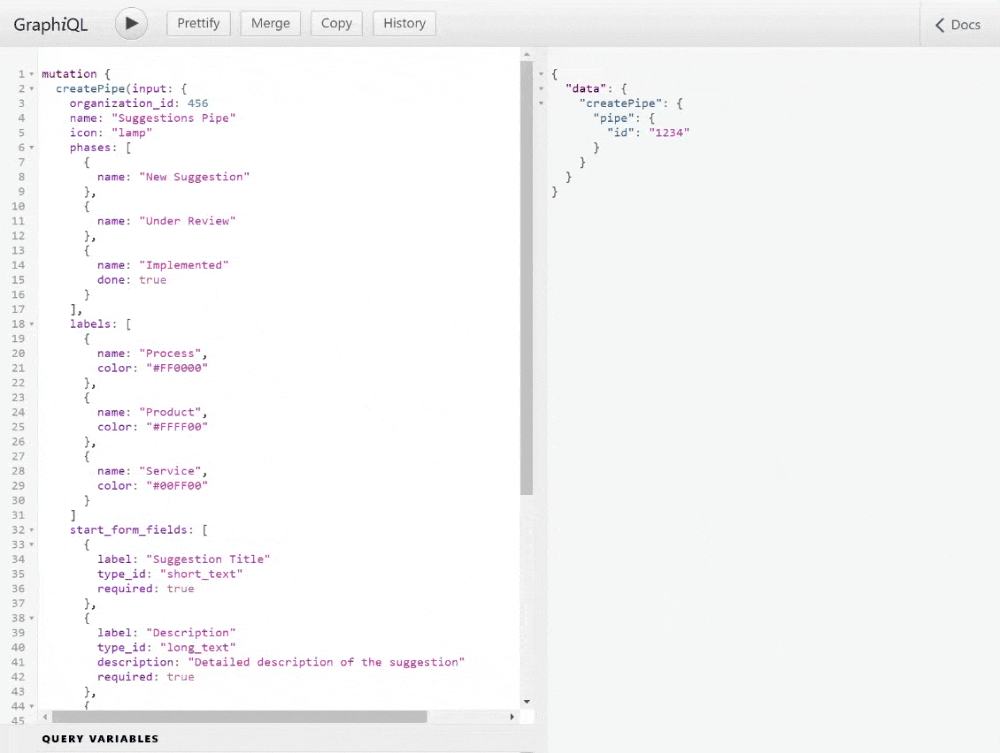
This is an example mutation on how to create a pipe. Notice that we use lots of arguments to create specific phases, labels, and even configure a start form with its fields. By doing this, we can define the pipe’s structure and behavior in one operation. In the return, we are getting the id of the newly created pipe so we can use it later for other operations.
Check out the mutation and then let’s break the input argument down:
mutation {
  createPipe(input: {
    organization_id: 300755308
    name: "Suggestions Pipe"
    icon: "lamp"
    phases: [
      {
        name: "New Suggestion"
      },
      {
        name: "Under Review"
      },
      {
        name: "Implemented"
        done: true
      }
    ],
    labels: [
      {
        name: "Process",
        color: "#FF0000"
      },
      {
        name: "Product",
        color: "#FFFF00"
      },
      {
        name: "Service",
        color: "#00FF00"
      }
    ]
    start_form_fields: [
      {
        label: "Suggestion Title"
        type_id: "short_text"
        required: true
      },
      {
        label: "Description"
        type_id: "long_text"
        description: "Detailed description of the suggestion"
        required: true
      },
      {
        label: "Category"
        description: "Suggestion category"
        type_id: "label_select"
        required: true
      },
      {
        label: "Email"
        description: "If you want updates on your suggestion, leave your email."
        type_id: "email"
        required: false
      }
    ]
  }) {
    pipe {
      id
    }
  }
}
Let’s analyze each argument of our mutation:
name: "Suggestions Pipe"- Purpose: Sets the display name of the Pipe.
- Note: Must be unique within the organization.
icon: "lamp"- Purpose: Defines the visual icon for the Pipe (e.g., "lamp" suggests an ideas/suggestions workflow).
- Options: Predefined icons in Pipefy (e.g.,
"rocket","checklist","airplane").
phases:Array- Purpose: Defines the stages of the workflow. Each phase represents a column on the Pipe’s board.
- Fields:
name: Phase name (e.g., "New Suggestion").done: true: Marks the phase as a final/closed state (e.g., "Implemented").
labels: Array- Purpose: Categories to classify cards (tasks) in the Pipe.
- Fields:
name: Label name (e.g., "Product").color: Hex code for the label’s color (e.g.,#FF0000for red).labels: Array
start_form_fields: Array- Purpose: Fields displayed in the form users fill out to create a new card in this Pipe.
- Fields:
label: Display name for the field (e.g., "Description").type_id: Data type of the field. Common options:short_text: Single-line text input.long_text: Multi-line text area.label_select: Dropdown with predefined labels.email: Validates input as an email format.
description: Help text displayed below the field (e.g., "Detailed description of the suggestion").required: true: Enforces mandatory fields.
Seems pretty complicated, right? So how do I figure all that out? It’s quite simple! Every detail is available in the Playground documentation, so we can refer to it anytime we need for the information we’re looking for!
Key Notes
- Phases Order: The order of phases in the array defines their left-to-right sequence on the Pipe’s board.
- Color Format: Ensure labels use valid hex codes (e.g.,
#00FF00for green). - Field Validation: The API enforces
type_idvalidity andrequiredconstraints. - Icon Limitations: Use icons supported by Pipefy (refer to their documentation for a full list).
And here’s the response indicating that our pipe was successfully created:
{
  "data": {
    "createPipe": {
      "pipe": {
        "id": "305750476"
      }
    }
  }
}
To access it we can search for its name in the UI or directly access the URL https://app.pipefy.com/pipes/123456789, replacing the 123456789 with the id of your new pipe!